Floor and Sill Replacement GT6 (Part 1)
by Liv Haasper
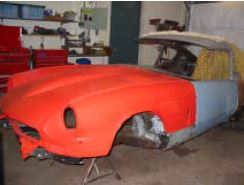
It was the day of reckoning. The time had come to tackle the installation of the new floor pans and the sills. This repair was executed one side at a time to keep the alignment of the car simple.
Bracing:
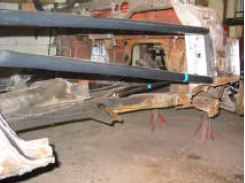
When we got the GT6, the previous owner had already removed the floor pans, sills and part of the firewall from the driver’s side of the car, but he had not installed braces to keep the body tub straight. Before attempts were made to weld in the newly purchased floors and sills, we took measurements and fabricated braces out of metal piping to assure the alignment of the car and the fit of the doors and bonnet. These braces, after the stripping of paint was finally achieved, were inserted into the door opening of the GT6. More on the fabrication of the braces read below.
Stripping to the bare metal:
We started the repairs on the driver’s side of the GT6, using tin snips and air powered cutting discs and also the spot weld drill. We cut away all the rusted areas of the fire wall, the sill, the A-pillar and inside edges. Before any welding and repairing could be started, we removed layers of black tar from the firewall. In order to weld properly and not contaminate the welds, the metal has to be absolutely clean. The PO, in an attempt to preserve the metal, had sprayed a black, gooey mess of tar onto every inch of the underside of the car. It was a big job, soaking it with thinner, scraping it off with knives, wire brushes and anything else that would work. With the help of a gallon of Poly Strippa we removed most of the paint and primer. We came across a layer of green top coat paint, and another of brown, original paint, a layer of grey primer and the last layer of rust undercoating. We removed and chipped away paint and soaked certain areas where fibreglass had been applied with thinner. We scraped away sections covered in bondo. In order to get the metal to a shiny and clean look, we used my air tool, the die grinder, and its 3M attachment, the roloc disk, polishing the metal until we were satisfied with the results. The last thing to tackle was to sand blast tiny, unreachable corner and fla nges. We repeated this process on the inside of the firewall and the areas bordering the transmission tunnel and behind the seats, which of course, had been removed at this stage of the restoration. The last section to clean in this fashion was the inside of the door and the A-pillar.
Repairing rusted areas:
Before any attempts of body repair were made, the braces were now installed into the open door gap.
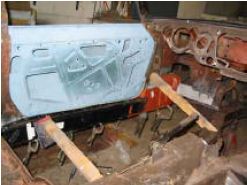
We were finally ready to fabricate bits and pieces of sheet metal to replace rusted edges and flanges and restore the A-¬pillar to its original shape. Using the cut-away pieces as templates, we cut sections out of 20 gauge satin covered sheet metal. For repairs of this nature, a satin covered finish is preferred in body shops because it’s more rust resistant than the *black*, or regular, sheet metal. It takes a bit of ingenuity to fit those replacement pieces to the panels of the car, making sure to keep the original shape. With the help of an English wheel, we bent certain pieces of sheet metal into compound curves. Flanges were created with a metal bender. We had one after-market sill at our disposal, but had to fabricate the second one for the passenger side. We learned rather quickly that the floor pans, and also the purchased sill panel, did not fit properly and had to be modified.
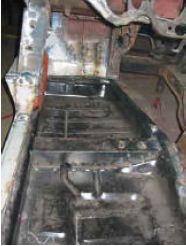
The entire installation process was started by attaching the inner sill to the A-post and quarter panel, clamping the sill into place and screwing in self drilling sheet metal screws as a temporary measure. We installed the door for a test fit and, when happy with the result, removed it again to continue the work. Now it was time to fit the floor panel, outer sill and, lastly, the cross member. Next thing on the list of jobs was the fabrication of repair panels for the fire wall and inner quarter panel. Then, the door was fitted again to ensure a good alignment. Finally, we were able to weld everything in place, using the MIG welder. The entire process was then repeated on the passenger side.
Welding was done through holes we drilled into the flanges on one side, imitating spot welds [plug weld]. Repair panels where butt- welded, using an oxygen-acetylene torch. Before welding, flanges had to be cleaned and stripped of primer and sprayed with Zinc-dust paint [weldable primer]. When all the welding was completed, the welds had to be ground off and sealed with a seam sealer. Now, the doors were fitted a last time to the rear wing and the bonnet to assure a proper fit with acceptable gaps.
To prepare the entire repairs for primer and paint, some body filler had to be applied. In order to do this, we removed the doors again [now getting really familiar with this process]. We used polyester resin body filler where needed, sanded it of in the usual fashion, then primered.
To prepare the entire repairs for primer and paint, some body filler had to be applied. In order to do this, we removed the doors again [now getting really familiar with this process]. We used polyester resin body filler where needed, sanded it of in the usual fashion, then primered.
Fabricating and installing braces:
Our braces were constructed in a form of a triangle, connecting the upper and lower door hinge to the door striker. We also installed a small pipe leading from the lower door hinge to the body mounting near the transmission. The braces were made of 1 inch tubing . For the end sections we used 1 ½ by 3/16th. angle iron. We fabricated two braces, one for each side, taking into consideration that each side of the car is different from the other.
Our braces were constructed in a form of a triangle, connecting the upper and lower door hinge to the door striker. We also installed a small pipe leading from the lower door hinge to the body mounting near the transmission. The braces were made of 1 inch tubing . For the end sections we used 1 ½ by 3/16th. angle iron. We fabricated two braces, one for each side, taking into consideration that each side of the car is different from the other.


