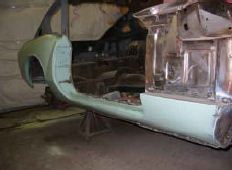
Floor and Sill Replacement GT6 (Part 2)
by Liv Haasper
Evaluating repairs:
Before we attempted the installation of the new floors, we had to evaluate the body repairs needed for the surrounding areas. We knew we were facing major repairs before work on the floors and sills could begin. The fire wall, and the mounting brackets to the frame were a major undertaking that needed immediate attention. The A-pillar had to be repaired. The rear cross member also had to be partly rebuild; this being the area where the trailing arms are mounted to the rear axle. The floor pan attaches under this panel. We also had to repair the rear wheel housings and inner quarters, because the inner sill attaches to it. The quarter panels needed replacement panels, which we had to fabricate. The outer sill panel attaches to these and creates the door opening.
When evaluating a restoration, one should always be aware of the fact that, over the years, most cars have undergone some sort of repair, often done by unqualified and inexperienced owners who may have botched the alignment of the panels. Sometimes, fibreglass has been applied or sheet metal of all descriptions brazed over the rust. At one time we came across a traffic sign used in this rather amusing fashion. It can be difficult to locate the original welds, making a proper repair challenging.
The firewall:
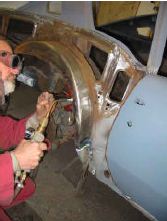
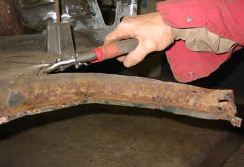
Our work began with the repair of the firewall. Several areas needed to be repaired. With tin snips, we cut a large corroded area out and, using this piece of rusted panel as a template, we fabricated a new section out of 20 gauge, satin coated sheet metal.
Tin snips come in different shapes and sizes, for different applications. For small repairs, where short sections or curves have to be cut, we use aviation tin snips. They are easy to use, even for metal up to 16 gauge. Left and right handed tin snips can be purchased. These are not meant for left or right handed people, but are specified as left or right handed waste sides [cut off]. When a long piece of sheet metal has to be cut off, a run-through tin snip is necessary. This tool cuts with no waste, but allows for a long, straight cut.
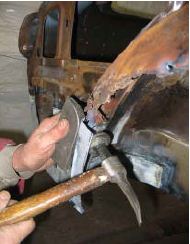
When repairing the firewall we encountered compound curves. The repair panel had to be pounded into its rounded shape, using a mallet, and hammering the sheet metal into a hollowed out wooden block. A leather pillow filled with sand is also a good tool to be used for this type of panel beating. The finished piece was finally carefully fitted and butt- welded [Oxygen/acetylene] into place.
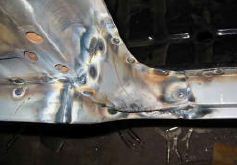
Let’s explain this procedure to people who aren’t familiar with this type of welding. The piece has to be tack-welded into place and aligned, then welded in sections of ½ to ¾ inch, finally hammered and dollied before it cools to avoid warping. This has to be repeated until the entire panel is welded in. The alignment has to be checked. This type of weld allows the repaired area to be sanded and cleaned from both sides, then painted which avoids rusting. The end result will look original. Mastering butt welding takes some practice.
The mounting bracket:
The mounting bracket, body to frame, to give it strength, was fabricated from 16 gauge sheet meta l. We drilled holes through the fire wall and, from the inside, MIG welded them into place, carefully aligning and bolting them to the frame. When performing major repairs or restorations, it’s a good idea, to ensure proper alignment while the body is still attached to the original, unrestored frame. If this kind of repair is done on a new or restored frame, chances are that it may be damaged in the process of repairs.
The A pillar:
The A-pillar was the next job to be tackled. It was rusted on the inside and needed repair sections. The rusted piece was cut out and a new one fabricated and welded in.
Rear wheel housings and inner quarters:
The lower section of the rear wheel housing and the inner quarters were totally rusted out and presented a challenge.
In order to fabricate new pieces into the panel, we first cut some templates from card board [ for additional help taking measurements from our MK3 Spitfire] and fitted this template to the wheel housing. After we were satisfied with a proper fit, we proceeded to cut the replacement piece out of sheet metal.
This was welded in our usual fashion of butt welding and MIG welding [plug welding]. For later restoration, we had to remove the quarter panels [rear wings] and we also had to fabricate pieces for the outer and inner wheels housing.
The rear cross member:
The last panel to be dealt with, before we could attempt the floors and sills, was the rear cross member including attachment points for the trailing arms. We noticed some damage on the lower section of the cross member where the floor attaches. Again, we fabricated repair pieces and welded them in.
Floors and sills:
After all of this bodywork was finally dealt with, we were able to concentrate on the installation of the floors and sills [see Part 1, for reference] … Finally, after all of this was accomplished, we were ready to finish off the panels
with polyester resin or body filler.
The welds had been ground off, using a 36 grid, flexible disk on a small air powered grinder. After this, the welds were sandblasted to remove any unwanted mill scale, ensuring a good adhesion of filler or primer and rust protection. At
this point, our preferred seam sealer, which is used on bare metal, was spread on the seams. Next job on the list was the application of a layer of body filler and, after drying, sanded it with 40 grid, followed by a second sanding of 80 grid, making sure that the contours of the panel were retained and the panel was straight, confirming to originality. In order to obtain this, one may have to apply a second coat of metal glaze or putty, sanding this down with 120/180 grid.
Prepping a repair in this fashion is crucial to a good paint job and should not be under estimated. One should not make the mistake of applying more body filler than absolutely necessary. It’s important to realize that sanding off excess body filler is more important than applying more filler than needed. To protect the underside of the floor from stone chips, we sprayed an application of gravel guard.
After all the prepping had been finished, a good adhesion primer was applied, followed by a filler primer, which would was sanded up to 400 grid.
Now, we were finally ready to paint and rust proof.

