Installation of Inner and Outer Sills on a 58 TR3A
By Don Elliott
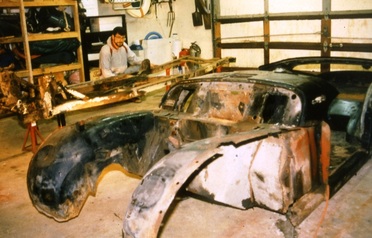
Dismantling the TR. Notice that the original frame was Primrose Yellow. My frame was painted before Primrose Yellow was available as an external colour for the TR3A. I have seen Red and Powder Blue frames too.
Dismantling the TR. Notice that the original frame was Primrose Yellow. My frame was painted before Primrose Yellow was available as an external colour for the TR3A. I have seen Red and Powder Blue frames too.
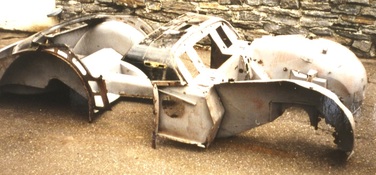
The front clip and the rear clip are totally separate with no floor pans, "B" posts, or sills to join the front to the rear.
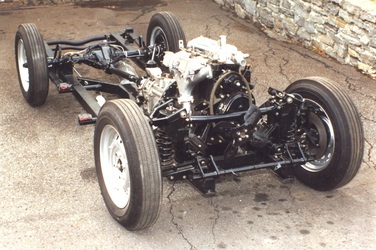
First I got everything back onto the frame after painting the frame and every part you can see and rebuilding the engine.
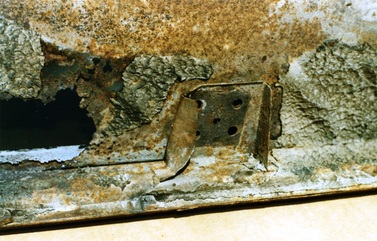
This is what my sills looked like in 1987 with 80,350 miles from new. Between 1958 and 1963, I didn't drive the TR in the winter, but I rallied it extensively, mostly on rural gravel roads - hence the dented pad support. From 1964 to 1972, I drove it in the salty and slushy winter snow in Montreal. Then it sat 14 years in my warm dry garage.
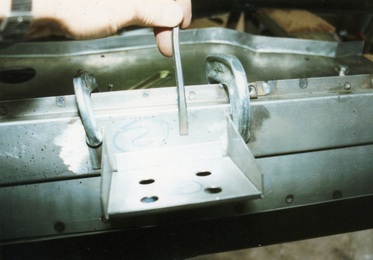
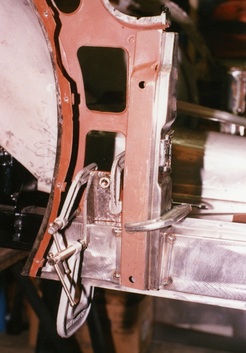
Using the position from the photo above for the correct height of the pad supports, I had to grind the new ones off the new reproduction sills and re-weld them to the sill in the correct vertical position so the new floors would sit at the right height and so the floor pans would fit correctly.
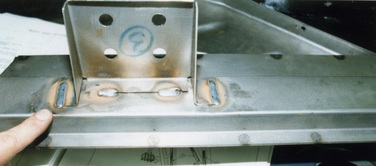
This shows the support pads after MIG welding them back onto the inner sills at the correct height.
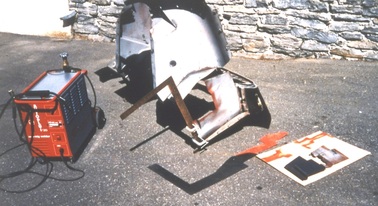
Here I'm MIG welding all the new patches onto the front clip in June 1988. Then I did the same with the rear clip.
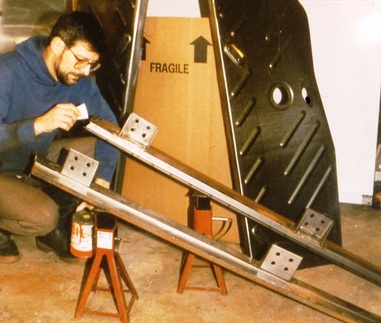
Here I am in 1988 pouring thinned out primer into the rear ends of the inner sills to help against rust developing. I rotated the sills to coat all the inside walls and let the primmer dry for several weeks. When the TR was finished in 1990, I sprayed Wax-Oyl into the sills through the 1/4-28 UNF nut hole in the front of the inner sill. There is still no visible rust.
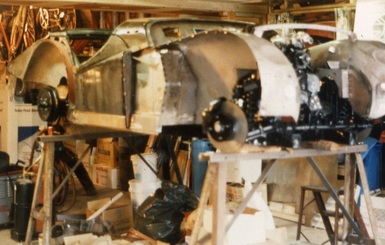
With the frame all painted, suspension back on, and the engine and gearbox/overdrive installed, I raised it all onto stands that I located under the axle lines. With the weight of these parts on the frame and supported under the axle lines, this simulated how the fully loaded TR would sit if it was back on its tires on the garage floor. Then I laid on the front clip, the rear clip, and laid in the floor pans and the inner sills. I inserted the spacer pads that fit between the pad support on the frame and the support pads for the inner sills - then bolted down the floor pans. I had to loosen these and re-tighten them several times to get it all adjusted just right before doing any welding. For the rest I used a lot of small to medium sized "C" clamps. Then I bolted on the front fenders and the doors and checked the fit. Like moving the new "B" posts and the rear clip towards the rear till I had the opening length for the door correct. I had to adjust things many times to get the door opening from front to back right and so the door gaps would be parallel. The door itself was the gauge when it was all correct. This was all still clamped together - not yet welded. When I felt it was correct, I MIG welded the bottoms of the "A" posts to the top of the inner sill. Then across the front of the floor pans and last the rear of the floor pans to the rear clip. Now it was back in one piece again.
I used a lot of clamps to hold the new "B" posts while adjusting the door opening length and the door gaps - all this before welding.
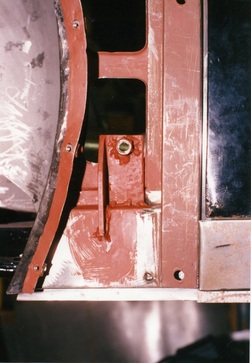
Then I welded on the new "B" posts. Notice that I installed a nut and angled plate behind the "B" post to later secure the attachment bolt for the lap-type seat belt through a hole in the interior trim panel.
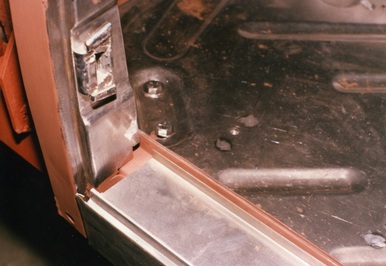
Then I installed the outer sill and found it was too short. I had to fabricate a patch and MIG weld the patch into place so there would be no gap. Then I ground off the excess weld till the weld was smooth and the joint was no longer visible. For the striker plate on the "B" posts, I had to file off about 1/16 inch from the rear of each striker plate so that the latch plate on the door would engage properly. I also had to close the gaps on the door latch plate to merge correctly with the striker plate on the "B" post. All this was needed so the door would fit the "new" opening I had created for the door between the "A" post and the "B" post and so the gaps would be right. While doing this prep work on the outer sills, I found that the reproduction outer sills did not have the correct curve from front to back so I used a rubber mallet inside the outer sill to achieve the curve to match the curve along the bottom of the door as well as the curve that exists from the bottom of the outer sill to the top. It's not much - but it's there - or should be. On a later TR3A I restored, I took those outer sills to a sheet metal workshop and they rolled the curves as I wanted using an English Wheel. To learn more, just Google "English Wheel - metal fabrication".
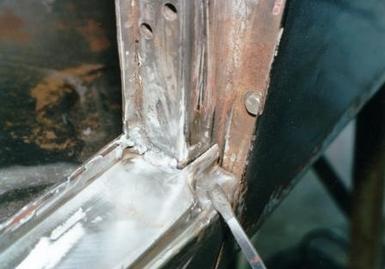
When I was adjusting the door, I found that the outer sill had a problem at the front corner down near the bottom of the "A" post. If I had opened the door fully, I would have squashed out the bottom inch of the lower front corner of the door skin. So I had to "re-work" the flattened indent quite a bit as shown by the screwdriver to get enough clearance. This gives the required clearance to prevent the problem.
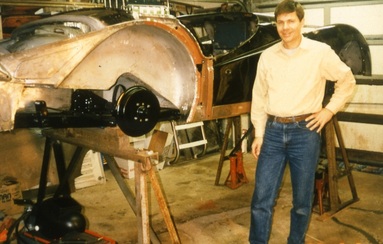
This is Bill Gray, one of the founders of the Toronto Triumph Club who came to Montreal in December, 1988 to see my progress. Notice that the gaps look good and the outer sill fits nicely too.
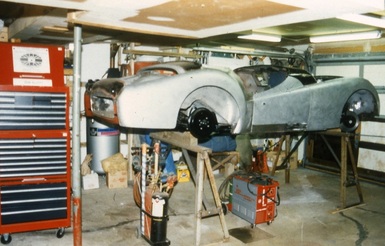
Here it is after I bead-blasted the fenders and the doors and mounted them all again. Do not have the body panels sandblasted as the sharp sand will overheat the sheet metal and the panel will become distorted and look wavy after painting. Notice that it's still on the stands under the axle lines. Everything is welded, the doors click shut and all the gaps are parallel and equal. After I put on the wheels and lowered the car all the gaps stayed perfect. Then the tub and all the separate panels were painted off the car and reassembled in late 1989.
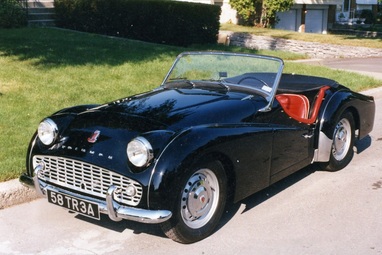
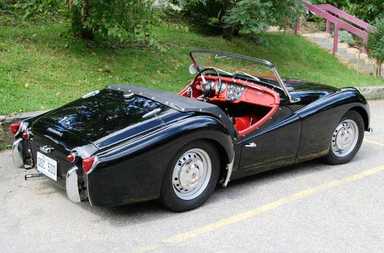
My TR3A is back on the road in August 1990 after three years for the restoration.
This is my TR3A in 2008.
This is what I look like today - 23 years and 113,000 miles later. But every time I drive my TR3A, I feel like I'm 20 years old again - my age when I bought "TRusty" brand new. My TR3A is still a 96 point concours car but with 113,000 miles on it since 1990.

Cheers (as the Brits say)
Don Elliott, Original Owner since May 1958, Montreal, Canada.
Comm. No. 8 TS 27489 LO - now with 193,000 miles total on the odometer.

